
Isimio is a generic scheduling tool for the Salesforce platform, capable of scheduling many different types of data. In this guide, we will create a basic model to create and track annual leave and other absences at your company. Here is how to try it out yourself!
Installing Isimio
If you do not already use Isimio, start by installing the app onto your org. We recommend going through this guide in a fresh sandbox first, before migrating or repeating it on production. This is to ensure that if anything goes wrong, no real data will be created or changed.
You can install Isimio from the AppExchange. There’s a free 30-day trial.
Once installed, Isimio will appear as an app. One of its tabs will be called Scheduler. Don’t open it just yet – first we have some objects to create!
Creating the Data Model
The beauty of Isimio is that it can work with your own data model. This means that you can create your own custom objects and fields – so feel free to deviate from this guide and add your own ideas.
We start by loading our org and heading to Setup. From the Object Manager tab, create a new object:

This will launch a form where we can name our object. I’ve decided to call it “Absence”, but feel free to use your own term – such as Holiday, Leave, or anything meaningful to your company. In the Data Type option, select “Auto Number”, and create an auto-number template like in the below image. You will also want to enable reports (and possibly activities) on the object.

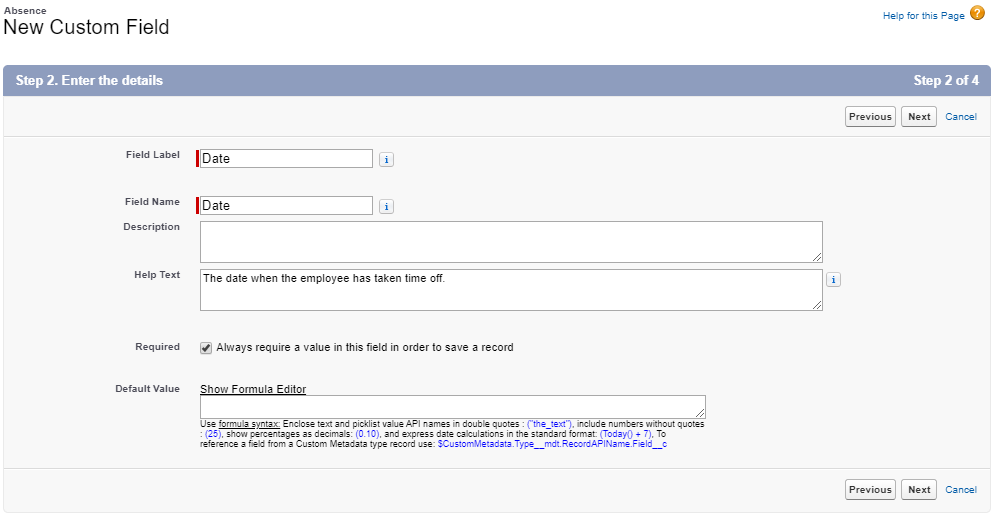
Now we’ll open the tab called Fields and Relationships, and click the New button to create a new field. The first field we want to add is the most important one: a date field. This date field will tell us when someone is taking time off. Select the date field type, and name your field date. Make sure to mark it as required!
Another important field to capture is the person who will be taking holiday. In my case, all of my employees exist in the system as users – so I will create a field with the Lookup type to the User object. I marked the field as required, because knowing someone is taking a holiday is worthless if we don’t know who it is. Your employees might be stored as contacts, or maybe even a custom object, in which case you will want to create a Master-Detail relationship field to that object.
For reporting purposes, I’ll create one last field to capture the type of absence. I want to keep track of holidays and illnesses separately, so that I could capture those statistics at the end of the year. This is a picklist field with a few options I want to keep track of, as well as “Other” – just in case.

Configuring Isimio
With the data model in place, we can begin to configure Isimio. When we enter the scheduler for the first time, we will be presented with the configuration wizard. The first step is to choose our new Absence object from the list of objects in the system.
Did you know that when viewing a long picklist, you can use your keyboard to take you to the option you are looking for? Typing “Absence” while the picklist is open takes me here:

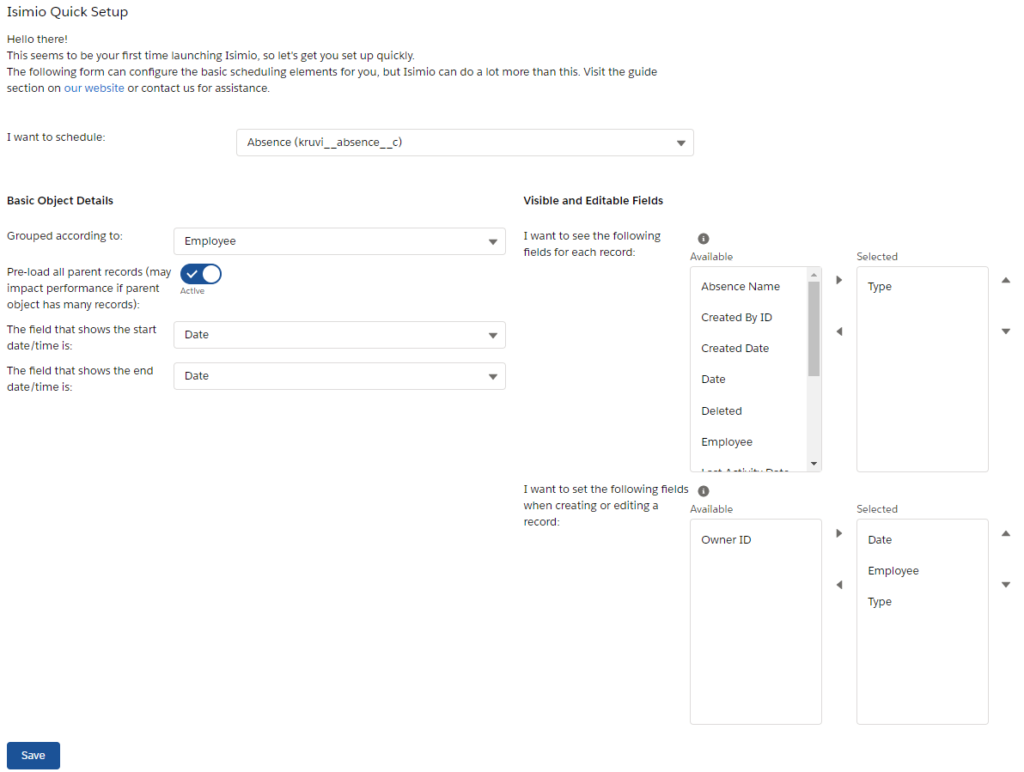
Once selected, we get a host of new options. We want to view absences by employee, so I’ll select the Employee field in the grouped according to section. I’ll select to pre-load all parent records, which would load all users into the schedule even if they do not have absences yet.
The next step is to select 2 fields: the start and end dates. In our case, we only have one date field in the object: Date. This serves as both the start and end time, so I will choose Date in both sections.
With that out of the way, I also have the option to select which fields I want to see, and which to edit in the scheduler. I’ve chosen to see Type, and to edit the date, type, and employee. This is what the full form looked like:
That’s it. You’re finished!
When you’re ready to continue, hit that Save button, and refresh the page.
Working With Isimio
After refreshing the page, you should see a schedule similar to this:

It may seem a bit empty, but that’s because we haven’t entered any absences yet! Double-click on any square (or right-click and select New Absence) to create our first absence record:

It just so happens that an employee, Harriette Potter, will be leaving tomorrow for a 2-week holiday to the Bahamas. Let’s enter that into the schedule by creating one Holiday absence on the start day and saving it. To extend it until the end of the month, right-click the absence and select the repeat option. I’ll repeat it until January 31st.
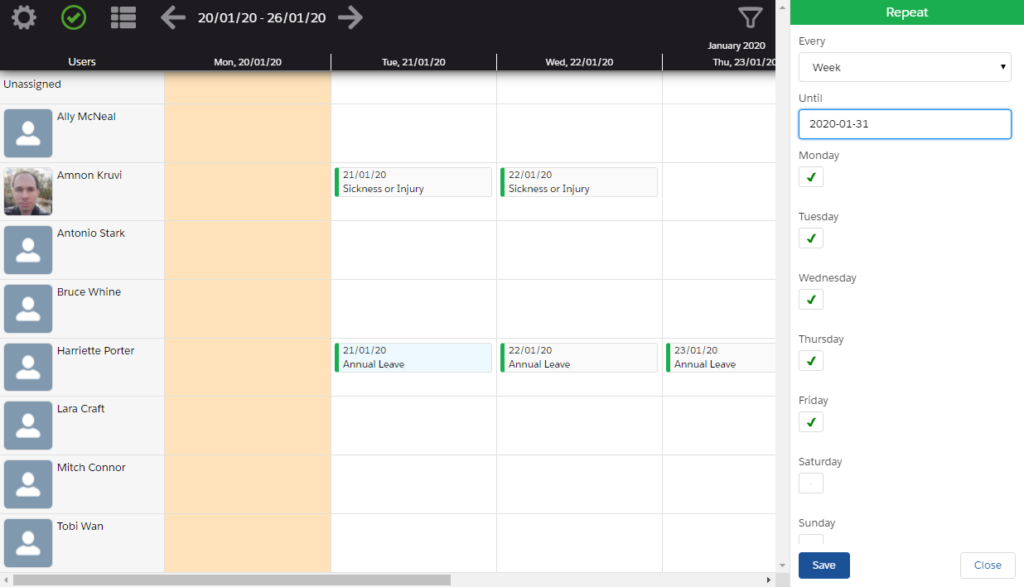
This duplicates the record all the way until our selected date, every weekday.
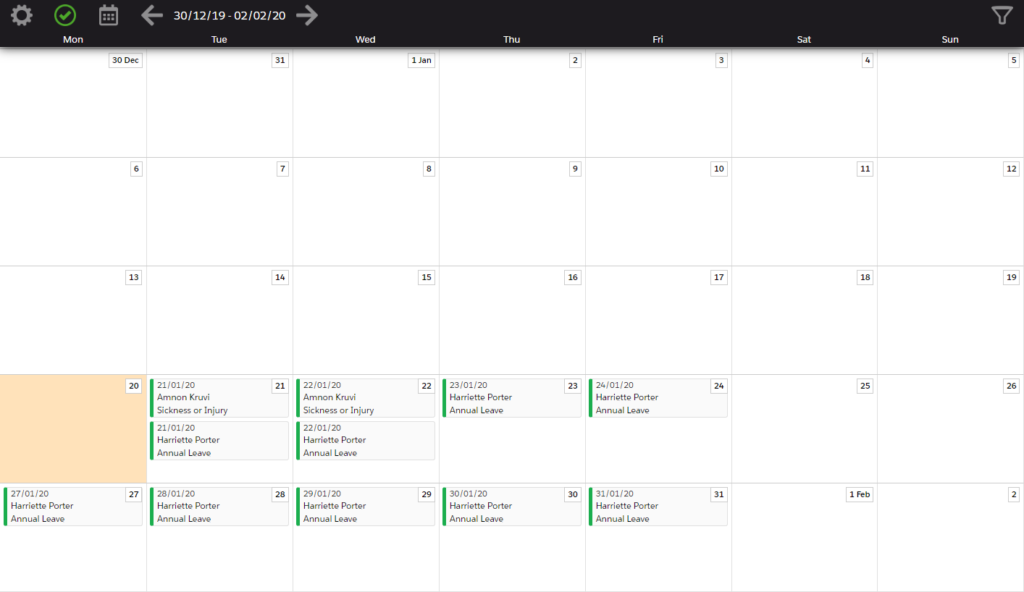
From here, you may move (by dragging and dropping), delete, modify, and generally populate your schedule as you see fit. Switch to the calendar view to get an overview of the month!


Create Analytics
Once you’ve populated your absence object, you are free to create your own analytics to report on time off taken by employees. Use the Salesforce reporting tools to create a report showing employee, date, and type of absence, filtered by the date field being in the current calendar year.

Sit Back and Enjoy Your Holiday
Congratulations, you have now configured Isimio to manage your internal holidays!